
Is Moving your WordPress Website a Stressful Thing?
The answer is YES!! Moving or migrating websites can be a stressful thing. Why?? Many reasons are associated with it. Some of them include but are not limited to:
- Who will be responsible for the move?
- Will there be any errors?
- Will there be any down-time?
- Will the business be affected by the move?
Answering these questions and many more, is what makes migrating a live WordPress website stressful for any business owner.
But, what if we told you that moving a live WordPress website does not need to be stressful. Infact, it can be a fun thing to do because when you move it to a local server, you will have opportunities to experiment with your current data that you cannot do on a live website. For instance, you can upgrade your existing theme or revamp your website without actually affecting the live version. Once you are done and happy with the results, you can move the WordPress website from local to a live server.
If you are interested in knowing more about this, just read on!!
A Groundwork for Moving a Local Site to a Local Server
First things first!! Taking a backup of the WordPress website is THE MOST IMPORTANT task. This is important because if anything goes wrong during or after the migration, you will have a restoration point for your WordPress website.
Two Methods Moving a Local Site to a Local Server
Once you have a backup of your WordPress website, you can use several methods to move your live WordPress website to a local server. We recommend using either of the two methods stated below:
- Use a WordPress backup plugin to move your website to a local server
- Install a local server environment on your system using WAMP for Windows and MAMP for Mac.
We will discuss both these methods in detail in the below:
Method # 1: Use Plugin to Move Live WordPress Site to a Local Server
Well, you’ll like to use this method because it’s easy-to-use and suits every WordPress user. The most popular plugin used for this purpose is Duplicator. It helps to create a duplicate package of your WordPress website in a few easy steps.
If you’re wondering what is the catch behind ‘Duplicator’? There is none!! This plugin not only lets you make a duplicate package of your site but also enables you to move your WordPress site to a new location. In addition, you can use this tool as a backup plugin. This plugin will add a new duplicator menu item in the admin sidebar upon activation. Plus, when you click on it, it will take you to the package screen of the plugin. (See an image below to find more).
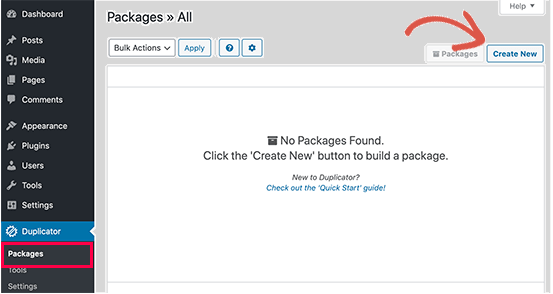
In order to create a new package, click on the ‘create new’ package button. And, then the duplicator will start off as a package wizard, where you’ll have to click on ‘the next button’ to keep going.
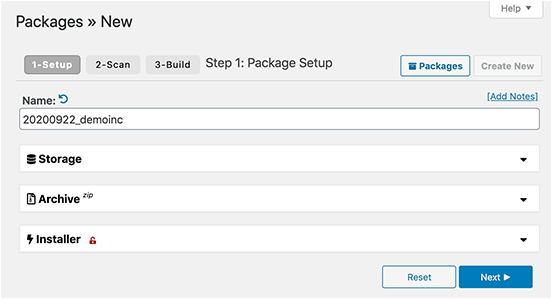
At this stage, this plugin would scan your entire website by running background checks. And, then you’ll see a summary of those checks at the end. You’ll see the ‘Build’ button to carry on, if everything goes correctly.

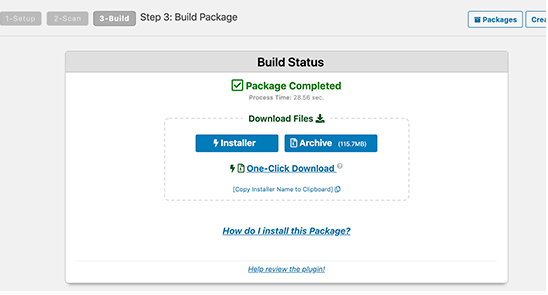
The plugin will start creating a website package for you now. And, when it’s finished, it will prompt an archive zip file containing your whole website data along with an installer file. Now, you’ll have to download both (a-Installer, b-Archive) to your computer.
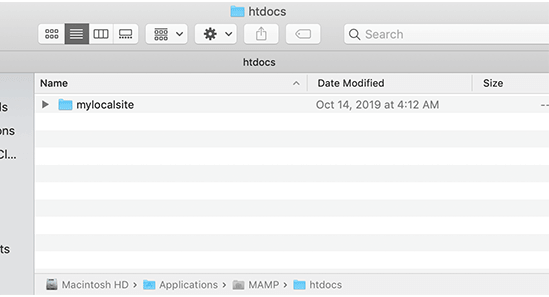
Once you have all the files downloaded, you’re good-to-unpack and install these files on your local server. At this stage, you will create a new folder in the root folder of a local server.
Important Thing: local server stores all websites in this folder. For example, if you use MAMP, then it goes like /Applications/MAMP/htdocs/folder. Or, you can use WAMP as an alternative which is C:\wamp\www\folder.
You need to open the folder that you’ve already created for the local WordPress site, copy-and-paste both archive zip files along with the installer script you downloaded previously.
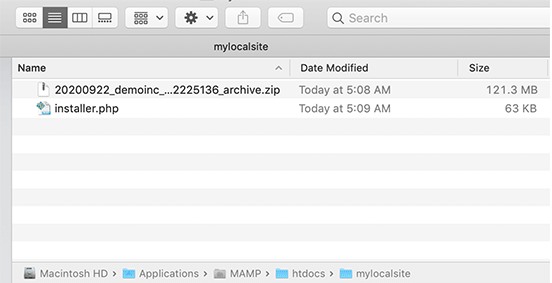
For running the installation successfully, open the installer.php script in your browser. Let’s say, if you’ve placed both of these files in /mylocalsite/folder;now, you’re free to access both of them in your browser through the link ( http://localhost/mylocalsite/installer.php ). Now, you’ll see the following Duplicator installation script:
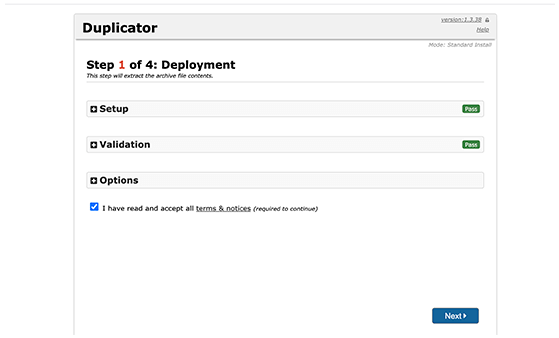
You’ll click on the ‘Next’ button to keep this process continue. On the other hand, duplicator unpacks the archive zip file and instructs you to enter database information of a local site. It is the database which you made earlier.
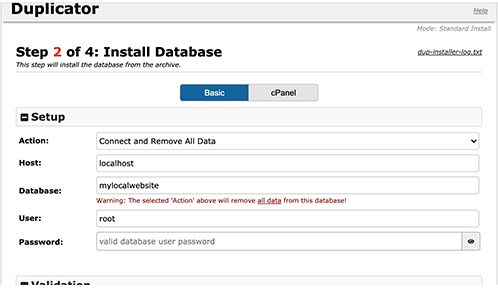
There are a few things you should understand, i.e., host will be a localhost, username will be root. Mostly, local server installation contains no set password for root, you can leave that blank, and there will be no problem. Whereas, at the bottom of the page, there is a ‘Test Database’ button to ensure that your database information is valid.
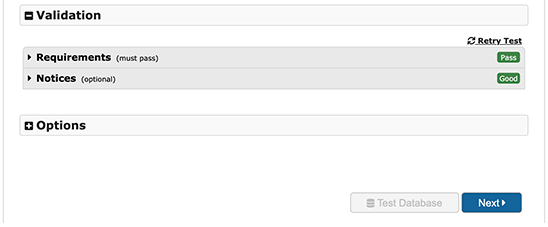
Don’t forget to ensure that everything is looking perfect. And, click on the ‘Next’ button to continue. Duplicator imports WordPress database and it asks you to double-check the new website information which it detects automatically.
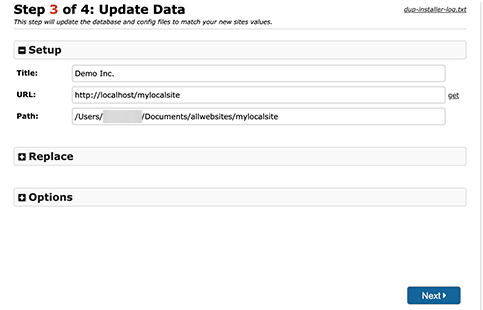
Click ‘Next’ and the duplicator will finish the setup and display a button to log into the local WordPress site. Only use that WordPress username and password that you’ve used on your live site.
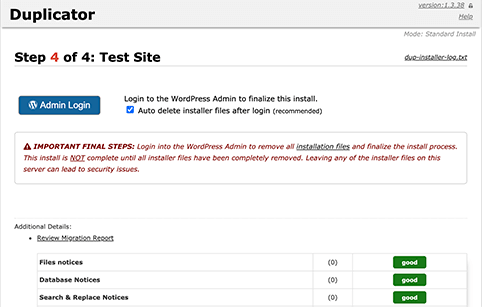
Hurray — your live site has been moved successfully to a local server…. Enjoy!!
Method 2. Manually Move a Live WordPress Site to Local Server
Step 1. Export your live site’s WordPress database
In order to export a database of Live WordPress website, you will have to do two following things:
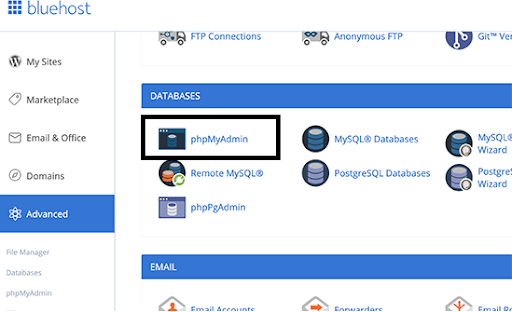
- Log into cPanel dashboard
- Click on phpMyAdmin
Important Note: We’ve used screenshots of ‘BlueHost’ dashboard below as examples:
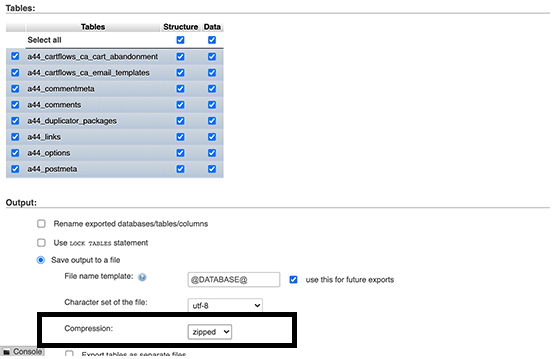
Right inside phpMyAdmin, you’ll select the database you want to export and hit on the export tab.
Now you’ll choose the export method from a) a quick, b) custom. Well, we will suggest you to go for a custom method through the use of Zip as a compression.
In most of the cases, WordPress plugins build tables inside WordPress databases which creates more confusion. Therefore, it’s way better to use a custom method instead of plugins because that method either weeds out or doesn’t create tables inside WordPress databases.
Keep in mind: you don’t need to work on all of the best options, just click on the ‘Go’ button which will start downloading database backup.
Finally, phpMyAdmin will start downloading the database file for you — Viva La Vida
Step 2. Download and Store All of your WordPress files
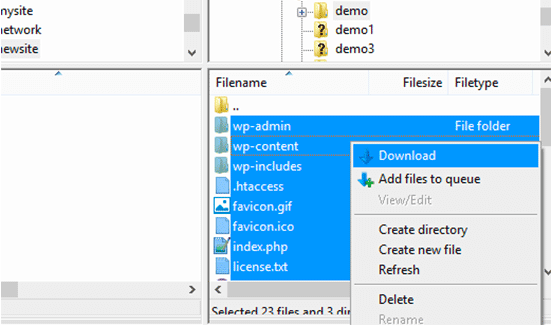
In this step, you’ll download WordPress files, for doing so, you’ll have to get connected to the WordPress website through an FTP client. When you’re connected- now, select all of your WordPress files,download and store them on your desktop computer or laptop.
Step 3. Import your WordPress files and database to local server
Once you’ve successfully downloaded your WordPress files, now you’ll have to make a folder on your local server for the purpose of importing the local site.
Let’s say, if you use WAMP, then create a folder inside C:\wamp\www\folder that will be used for a local site. And, for MAMP users, they will create a folder in /Applications/MAMP/htdocs/folder.
Once you’ve done it, copy-and-paste all of your WordPress files in the new folder. Import your WordPress database in this step. Now, simply open the phpMyAdmin using the link (http://localhost/phpmyadmin/) on your local server
As you’ve learnt that to create the database in early stages, right now, select it, and hit on the import tab.
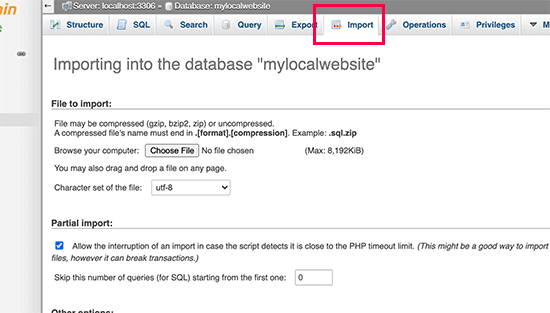
At this step, click on the ‘Choose File’ button for selecting and uploading the database export file that you’ve already downloaded previously. Now, hit the ‘Go’ button which you’ll see at the bottom of the page.
You’ll see phpMyAdmin unzipping and importing your WordPress database. So make sure that your database is clearly set up. And, don’t forget to update all of the URLs in your WordPress database redirecting to a live website.
Using SQL query in phpMyAdmin could be an ideal solution here. So, if you’re interested in utilizing this method – ensure that all of your local site’s database has been selected and click on SQL.
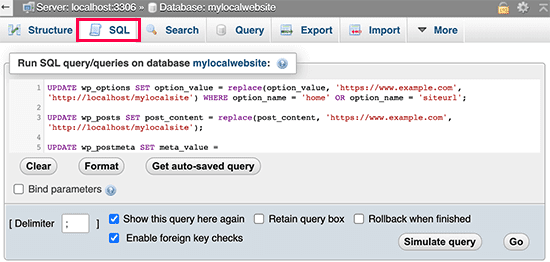
Copy-and-paste this code in phpMyAdmin’ SQL screen.
Important Point: you’ll have to use the URL of your live WordPress website along with http://localhost/mylocalsite instead of example.com as shown below:
					UPDATE wp_options SET option_value = replace(option_value, 'https://www.example.com', 'http://localhost/mylocalsite') WHERE option_name = 'home' OR option_name = 'siteurl';
UPDATE wp_posts SET post_content = replace(post_content, 'https://www.example.com', 'http://localhost/mylocalsite');
UPDATE wp_postmeta SET meta_value = replace(meta_value,'https://www.example.com','http://localhost/mylocalsite');
In the end, this query will completely change the redirection to your live WordPress website’s URL as it will activate localhost URL.
Step 4. Update wp-config.php file
In this final step, you’ll have to update the wp-config.php.file of your local site. This file comprises WordPress settings i.e., How to connect to your WordPress database?
All you need to do, just go to the folder (where you’ve WordPress installed on local server), and open wp-config.php file in a text-editor i.e., Notepad.
Now, replace the database name with one that you’ve made in phpMyAdmin on your localhost.
Later on, change the database username with local MySQL username (it’s usually root). Let’s say, if you’ve already set a password for the MySQL user root on localhost, don’t worry – enter that password. Or, you can leave it and save all changes.
					/** The name of the database for WordPress */
define('DB_NAME', 'database_name_here');

/** MySQL database username */
define('DB_USER', 'username_here');

/** MySQL database password */
define('DB_PASSWORD', 'password_here');
So enter the URL like this ( http://localhost/mylocalsite/ ) to reach out to your local site in a browser window.
Finally replace ‘mylocalsite’ with the name of the folder with copies of WordPress files.
And, you’re done… you’ve successfully copied your WordPress site to your local server.
Migrating Live WordPress Website - Easy or Not!!!
We hope that you have learnt much about the quick and effective ways to move your live WordPress site to a local server. All of these steps that we’ve covered are practically tried-and-tested.
Well, if you can’t move your live website to a local server or if you don’t have enough knowledge, still you don’t have to be worried at all because WP-Bridge is providing migration services to help you identify and resolve key problems and help you in migration of your WordPress site to a local server.
And, lastly, don’t forget to share this article across Facebook and Twitter.
Thank you