
Don’t Know Javascript!!
Javascript is one of the languages that many dread because of its long and complex lines of codes that are required to be written even if a slight change is required in the website. Even then, no website is complete without it because it is used for enhancing the functionality of your WordPress website. Whether you are creating your own custom website or using WordPress to do it, javascript will be required.
In such a situation, not only knowing javascript is essential but also knowing how to edit it is important. This is especially true when working with WordPress because WordPress does have javascript as one of its basic source code files that are required to design, and run the website.
So, the question is if you are not well-versed in javascript, can you still edit it if you have a WordPress website?
Yes, absolutely!! And the plus point is, we have years of experience to tell you how you can edit javascript in WordPress using the most easy ways. Well, it is easy for us and hopefully it will be for you too.
What is the Easy Way to Edit WordPress JavaScript Files?
We have already explained in one of preceding posts ‘Editing the Source Code of WordPress’ that Javascript files are source code files that need to be accessed first in order to be edited (you can read about accessing it in the post).
Continuing from there, all WordPress themes contain Javascript files which are either embedded in the theme or can be ‘called’ by applying certain codes in the template or source code files. This is known as editing or as we like to call it tweaking. Normally, you would be tweaking the footer or the header files as that is where the Javascript is used the most.
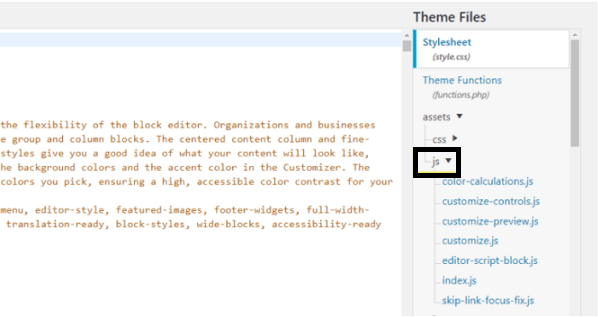
So, following on from the discussion in the post ‘Editing the Source Code of WordPress’ we are assuming that you have now reached the Editing mode of the WordPress source code. If you look in the image below, you will see a .js extension. This contains the list of all the Javascript files that your website has.
It is a good practice to actually create a separate Javascript file and then call it. If you change the code directly there is a possibility that it might not work as you would have hoped and the website crashes. If you use the separate file, you can always remove it and revert back to the original settings.
In order to use a JavaScript file (which you’ve written), you have to call the file wherever you want to apply it. You can use the following script(it will redirect your page to the location of the appropriate file), and the good place to call your JavaScript file relies on how you want to use the script.
<script type="text/javascript" src="https://mk0wpbuffsv2lxgilx63.kinstacdn.com/scripts/myJavaScript.js" defer></script>
This method is used when you already have a separate Javascript and know where to place it. The next section is even more precise as it informs you about the changes you can make to the header and footer section of your WordPress website using Javascript.
Which is the Effective Way to Add JavaScript to a Header or Footer Section in a WordPress Site?
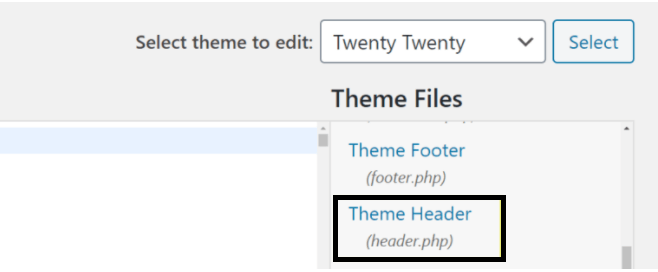
To change header or footer throughout your website, you will have to use JavaScript in different places. You’ll be working with the header.php file and it should be listed to the right of your Theme Editor. And, it is enclosed by the tags:
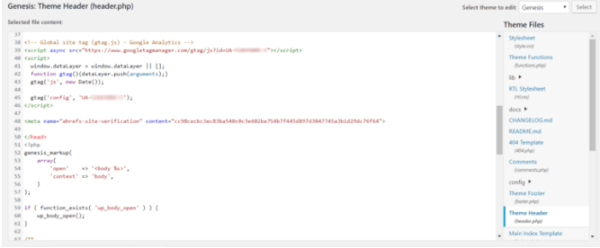
It may not be easy to locate tags. Therefore, you can locate them by pressing Control + F keys in the editor. Or, simply type “Head” to find it in the search bar. Following is an example demonstrating how I incorporated Google Tag Manager and Ahrefs Verification Code just above the tag:
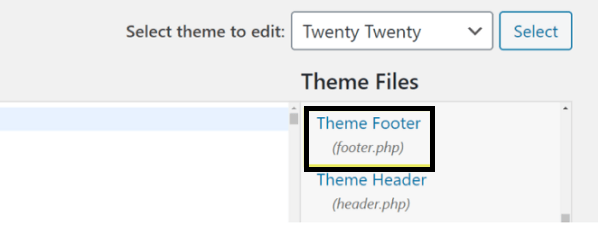
Editing the footer is done in exactly the same manner as you did in the header. All you need is to select the footer.php file instead of header.php and you’re ready-to-go.
Once you have saved all changes, the last step you will have to take is to re-check whether your code was added to the header and footer files or not. To carry out this process, just go to your home and immediately view the source code. Or use the command + F key to locate the tag, and look at the right-side of your screen to ensure that you’ve added your code successfully.
If you think that this manual process is overwhelming and want a more easy solution, then go for a plugin.
What is the Best Plugin for Adding Header & Footer Scripts?
Generally, WordPress themes and frameworks come with built-in functionality for adding header and footer scripts. For example, the Genesis Framework can help you with header and footer scripts. It comes with a built-in editor to help you utilize full functionalities for any theme.
This method is very useful because WordPress overwrites your header.php file during updates, therefore, this plugin lessens the complexities and it becomes easy to update WordPress Source Code for Javascript without re-adding your code manually.
Use Insert Header and Footer plugin to ease up editing process:

Simply add code to the header/footer of your WordPress website. Plus, this plugin comes handy especially in third-party code integration, Google Analytics scripts, etc. Rest assured – this plugin does a better job in a few clicks.
When you’ve done installing and activating the plugin, access the JavaScript editor: Settings>Insert Headers and Footers:
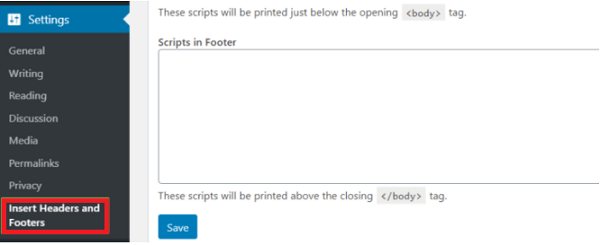
Next, you’ll see ‘text fields’ where you can add scripts to the header, body and footer of your website. In the end, when you’re done, hit the ‘Save’ button.
So, now that you have learnt to edit the header and footer section of the website, it is time to move on to the post and pages of WordPress where you will need to either add or edit the Javascript.
What is the Easy Way to Add JavaScript to WordPress Posts and Pages?
You will need following things to optimize your endeavors:
- Incorporate JavaScript to your WordPress theme files
- Custom Fields Feature to call the file from your post/pages.
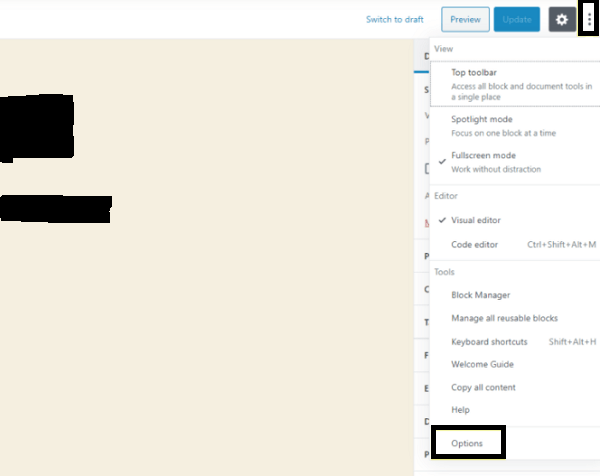
Go to the Block editor, and click on three vertical dots (it will launch a drop-down menu), and then click ‘Options’:
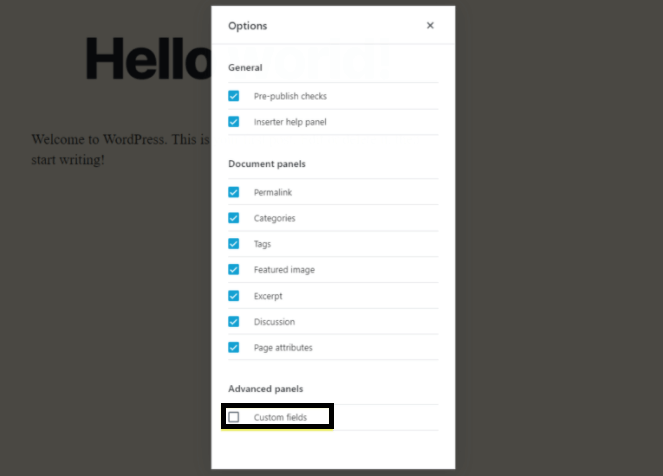
Tick on the ‘Custom Fields’ in advanced panel in ‘Options’ (have a look at an image below):
So, you will see a space to add custom field under a post editor
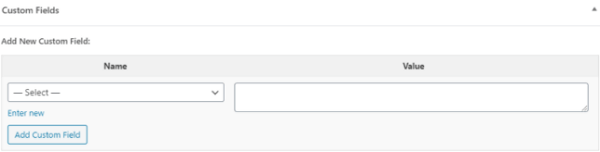
So, type a Name of your field and use a JavaScript snippet as the Value. Click on Add Custom Field to save your changes.
At the end, you can apply custom JavaScript on the page. You will need to incorporate a template tag which will customize the theme (that you’re using currently). Likewise, you can use a plugin to automate custom fields management for you.
Finishing Up!
This wasn’t bad at all was it? If it was a little, well we did tell you it is the most dreaded of all languages. But WordPress does make it easier.
If you still think it is beyond you, just let us know. Our experts will happily guide you through.