
It’s a laborious task to create, manage and maintain a website but it can be made easy – from managing to maintenance – if you know your way around the hosting account control panel. Given the increase in usage of WordPress as a website builder platform, cPanel in WordPress has become quite popular.
Since cPanel is a popular web hosting control dashboard, certainly, there is an option of using it. It is user-friendly, intuitive and comes with all nuts and bolts for configuring your WordPress site.
In this article, you will walk through 7 effective and helpful tips to enable you to install, access and configure your WordPress site easily.
What are the Seven cPanel for WordPress Tips?
Following are the seven best cPanel for WordPress tips covering everything from installation and access to configuring. They are well-explained and highly useful to make it easy for you to use cPanel for WordPress:
Tip #1: How to Access your cPanel Dashboard?
Before we dive into details, let’s learn how to find your WordPress cPanel login screen. This process depends upon your hosting service provider.
First, log into your hosting account and check for a link or button saying you to ‘log in to cPanel’:
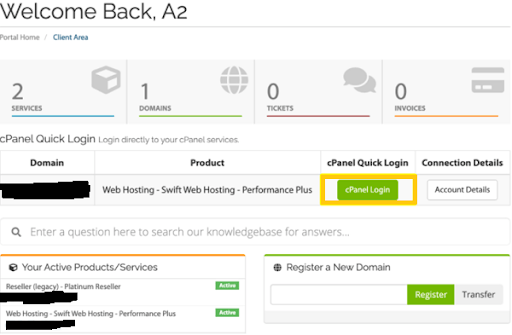
Once you click the button, you’ll land on the cPanel dashboard now.
If you do not see this option, then open your preferred browser, enter your domain name followed by 2083 (for example, https:// example.com:2083) and it will show you cPanel login page:
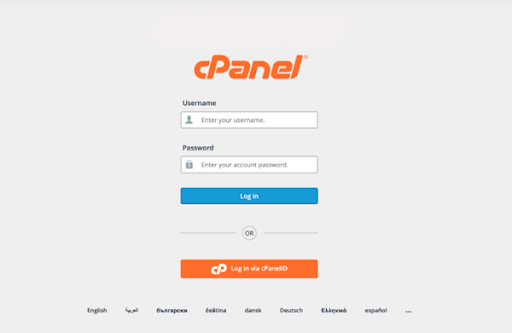
At this step, ask for cPanel credentials from your hosting provider and login.
Key Thing to Remember: You should have an SSL certificate installed on your WordPress site to access cPanel in this way.
Now that you have access to your cPanel account, it is time to get on the next step.
Tip # 2: What is the right way to Install WordPress in cPanel?
WordPress users can install Content Management System (CMS) without needing to upload files manually – a very useful feature for WordPress users.
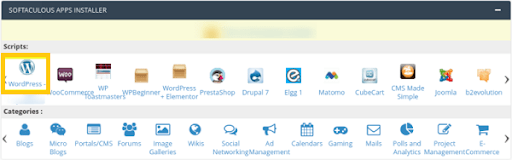
To begin with, you need to log into your cPanel dashboard. Once you have access, browse the Apps section and select ‘Softaculous Apps Installer’. In this step, you’ll see a screen full of apps, from the list of available apps, select ‘WordPress’ right away:
Right on the next screen, click on ‘Install’ and then pick a ‘one-click’ or custom option. Here, you’ll have to select a domain for installation of WordPress. We will use ‘subdomain’ for this purpose.
You will see Softaculous (App Installer) showing the WordPress admin and password automatically at the bottom of the screen. Now, enter your email address in the email installation details.
Now, the installer will begin loading. It might take a little time to finish off the process. Upon completion, you will see the screen provided below:
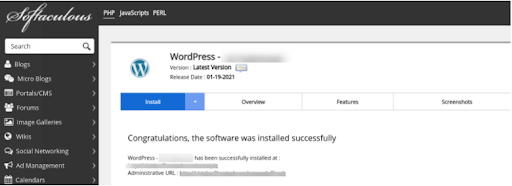
The message comes with login information with a link to the WordPress login page. You will get all details sent to the provided email address.
How to Install WordPress in cPanel Manually?
Unfortunately, if you don’t have a one-click WordPress installation option provided by your hosting provider, you can install it yourself manually via cPanel which will take hardly five minutes to install, saving you from the extra tediousness of connecting your server via an FTP client remotely.
The first step here is to create a WordPress database. Log into your cPanel account to do so and click on MySQL Database Wizard under the database section:

Enter the name of your new database and click on the Next Step button. In the screen showing ‘Create Database Users’,put a username and password, and click on ‘Create User’:

At this point, you’ll be asked to assign privileges to the database. For this, click on Next Step > Return Home. In case, if you haven’t already, you should navigate to the WordPress site and download the latest version.
Now, return to cPanel, navigate to File Manager present under the Files section:
When you’ve launched the File Manager, look for the public_html directory. Now, click on the Upload button and start uploading the WordPress.zip file:

Click on the ‘Go back’ button once loading is over. Here, select the WordPress files along with Extract.
After the files have moved to the public_html directory, visit your domain in the browser. A WordPress welcome message appears, following the installation prompts to begin setting up your WordPress site.
Tip # 3: What is the Way to Access your WordPress Admin Dashboard from cPanel?
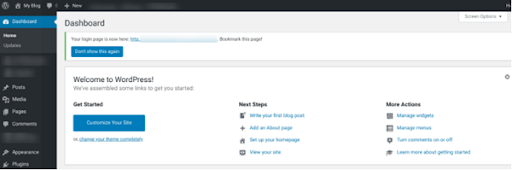
After finishing WordPress installation, you can access your admin dashboard from cPanel. A quick and easy way to do this is to click on the link that was sent to your email when you installed the CMS. Also, don’t forget to click on the administration URL link provided in cPanel.
Right after clicking on the link, you’ll be redirected to the setup page. Here, you will see guidance for new users:
Tip # 4: How can You Use the cPanel File Manager?
File manager is a handy feature in cPanel. From accessing your WordPress sites’ files for critical editing to resolving technical glitches, you can do anything comfortably. Following are a few examples:
- When you have to create a child theme, or when you have to implement WordPress multisite.
- You can troubleshoot errors preventing you from accessing WordPress dashboard
- Upload or remove themes and plugins manually
- When you have to incorporate custom code or have to turn on debug mode.
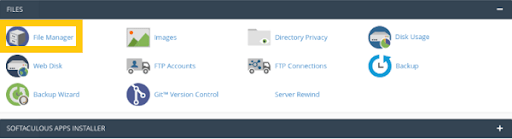
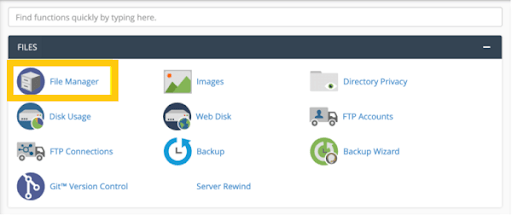
File manager interface has a user-friendly interface where you don’t need an extra set of login credentials. Take a look at the image below telling you how to access the cPanel file manager – Files > File Manager:
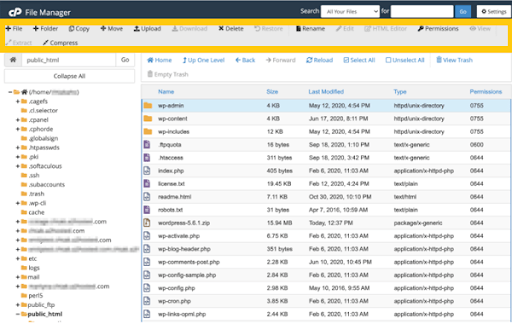
It will take you to a list of all files uploaded to your server through a hosting account. For accessing your WordPress files, search for public_html folder:

You can upload, delete, edit and download your website files for creating backup, managing file permissions and using more options:
Tip # 5: Open phpMyAdmin from cPanel
A WordPress site also contains a database in addition to WordPress files. A WordPress website owner can edit information stores in the database to solve errors, add/remove user(s) from a WordPress site, or even enable you to reset lost WordPress password.
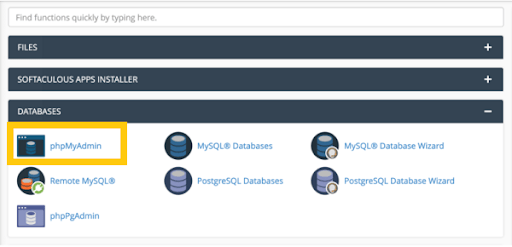
Here, you’ll have to go phpMyAdmin: a database management tool used to communicate data from your site and successfully finish any of the tasks. A way to access comes via cPanel by Databases > phpMyAdmin
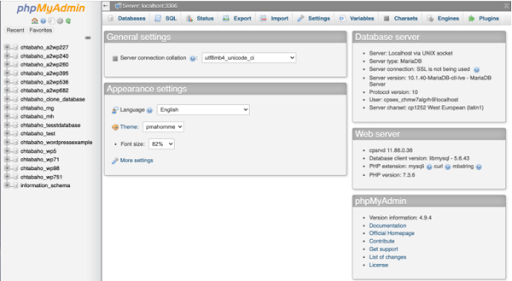
When you’ve opened phpMyAdmin, find your database in the list on the left side and view its tables by expanding it:
You should be able to apply relevant instructions to solve errors or you may edit the changes.
Tip # 6: Change your WordPress Password from cPanel
In case, if you have lost your WordPress password, you can use phpMyAdmin from cPanel to change your WordPress password. To do this, access phpMyAdmin from cPanel, go to the database of a website, edit the users. Now, in a few more clicks, you can comfortably reset the encrypted passwords for users.
Tip # 7: What is the correct way to uninstall WordPress from cPanel?
Let’s say, you want to launch a new website or want to get rid of WordPress installation, you can do anything via cPanel easily and in a record time. Well, before doing anything, you’ll have to build a backup first for future use. After you’ve made a backup of your WordPress site, log in to your cPanel account in the next step. At this stage, open your File Manager and look into the public_html directory where you could select and delete WordPress files.
Now comes the time to delete your database. For doing this, click on MySQL Databases under the Databases section of cPanel dashboard. And, finally, select and delete the WordPress database. WordPress no longer exists.
Final Words - 7 Effective Tips for cPanel for WordPress
Mo website owner can deny the fact, ‘a web hosting control panel by a hosting provider has to play a crucial role in managing a WordPress site. Therefore, it is super-important to be familiar with how to use cPanel for WordPress. That’s why, we talked about cPanel and its uses at length throughout the article.
If you feel this is too confusing or complicated, just reach out to us at WP-Bridge, and our experts will take care of everything.